
Two techniques that are occasionally confused for one another are balayage and color melting. While they can both be used to achieve similar results, they are fundamentally different techniques. Below, we define both techniques, walk through the general process for each, and highlight the key differences so that you can be confident in your understanding.
What Is Color Melting?
Color melting is a technique that is typically used to blend highlights or balayage into a client’s root color as the roots grow out. The end result is a natural, lived-in color without harsh lines of demarcation that might otherwise form naturally. Color melting is all about depositing tone to create a customized blend—no lightening involved!—which is the key difference between this technique and balayage.
Melting is such a wonderful technique due to how it provides the look of lived-in, gradient color while also offering complete tonal change of the raw lift.
COLOR MELTING TIPS
1. MELT ON DAMP HAIR.
Color melting should always be done on clean, damp hair. If you’re performing the melt after you’ve already completed a lightening process, make sure that you’ve shampooed all of the lightener out. Failure to do so can result in a shifted base, and nobody wants that!

2. ADD SOME CONDITIONER TO THE ENDS.
Adding a light conditioner on the ends will help prevent the darker color from transferring onto the ends. Porous hair absorbs anything in its grasp, so creating a little barrier of conditioner will help keep that cuticle in check.
3. PRACTICE YOUR SECTIONING.
Clean sectioning is important because color can transfer on to other sections fairly easily. Wipe your hands off between sections to keep things as neat as possible.
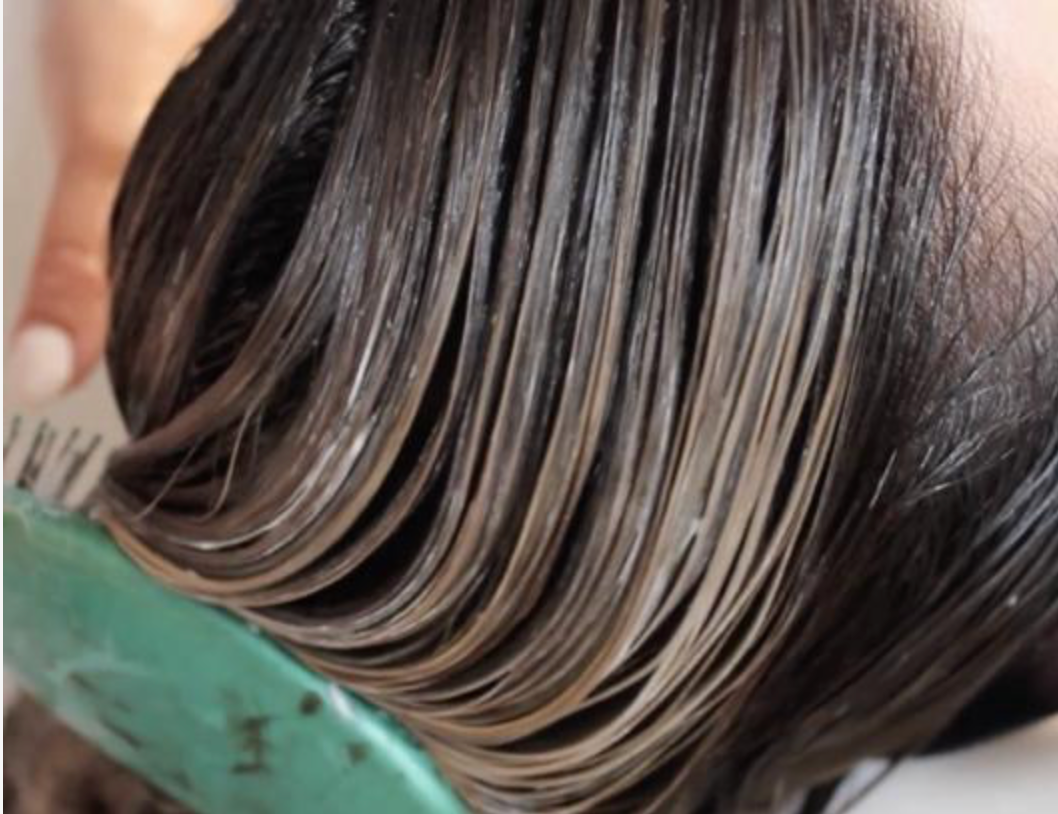
4. MASTER YOUR BLUR GAME.
Aggressively brushing the mid section where the melt meets the lighter ends is important for a seamless blend. Using a wet brush is very helpful!

5. LEAVE THE FRONT FOR LAST.
If you are aiming for a brighter front section, it's best to section out that area and leave it for last! Don’t place depth where you don’t want to see it.
6. BUILD YOUR CONFIDENCE.
Formulation is often one of the trickiest parts of color theory, and for that reason it’s something that a lot of stylists struggle with. Improving your skills will allow you to become more confident in your abilities, which will help you communicate better with your clients and deliver better results. Taking an online color theory course can be one of the best investments you ever make in yourself.

What Is Balayage?
Whereas color melting is all about depositing tone to achieve the right color, balayage is a lightening technique that uses clay lightener. Balayage involves applying product to hair in a natural manner (quite literally painting it on) in order to achieve a natural, sun-kissed, lived-in look. It has been around for many many years, but has become one of the most popular services requested.
Balayage is a very soft, lived-in type of lightening service. Everyone loves that end of the summer hair with natural highlights from the sun. It’s the hair you had as a child after spending your days on the beach. As opposed to traditional foil highlights, balayage takes great care to avoid harsh lines of demarcation. The goal with balayage is to simulate that same look, lightening all the areas the sun would touch. Yes, there are many different reasons for balayage, but ultimately that was the original goal of what balayage was meant to achieve.
While balayage isn’t the right technique to use for every hair type, it is absolutely perfect for people who want less maintenance and a more natural, blended type of color. It particularly compliments medium to light hair and is a great way to introduce someone to lightening services as it can be very gentle and natural.
BALAYAGE TIPS
1. PRACTICE YOUR TECHNIQUE.
Balayage is truly an art, and every stylist has their own unique way of painting. That’s why it’s so important to practice a number of different application techniques to find the one that works best for you.
2. MASTER SECTIONING.
Balayage requires completely different section sizes and placement for a proper application. Leveraging different section sizes also allows us to create multi-dimensional color simply by means of adjusting how large of a section we are working with. Horizontal sectioning, diagonal sectioning, U-shaped and V-shaped sectioning, and zig-zag sectioning can all be leveraged to great effect.
3. UNDERSTAND THE SCIENCE BEHIND YOUR LIGHTENER.
Bleeding and banding are some of the most common mistakes associated with balayage. While there may be many different causes, using the wrong type of balayage lightener or a lightener that is the wrong consistency are very often the culprit.
4. INVEST IN EDUCATION.
Education is so helpful for all of these things. Many stylists get frustrated with balayage because they haven’t built the confidence to address their struggles with it. Asking for help and investing in yourself is absolutely necessary for becoming a balayage specialist. Don’t be afraid to make mistakes, this is always how you start to learn what needs to be strengthened. Taking an online balayage course or attending an in-person workshop can be excellent ways of improving your skills.
Color Melting Vs. Balayage
In short, the key difference between color melting and balayage is the fact that one is a coloring technique which works by depositing tone while the other is a lightening technique. Though both can be used to achieve similar results, the mechanism by which they work are very different, and should be leveraged in different scenarios.
Invest in yourself! Sign up below to continue learning how to become a confident stylist.